Using Scaleway Object Storage as a Laravel S3 File Storage
Scaleway Object Storage is a S3-compatible object storage service by the French cloud platform Scaleway. Scaleway Object Storage automatically stores files in multiple availability zones (Multi-AZ) and only uses renewable energy to power their servers. This tutorial is a step-by-step guide on how to store files in Laravel to a Scaleway Object Storage bucket.
Create the bucket
Scaleway offers a few different ways to create resources like an object storage bucket, like the web interface, an API, a CLI tool and also a Terraform provider. In this guide I use the web interface, but for more complex setups it might be a good idea to use something like the Terraform provider.
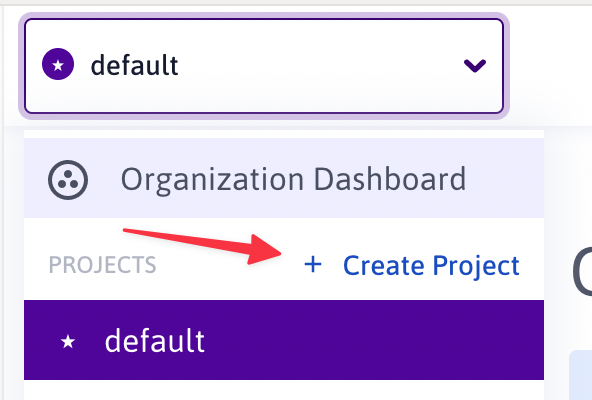
At the moment credentials can only be restricted on a project level, so if you want the Scaleway credentials that you store in your Laravel application to only access the buckets, you have to create a new project that only contains the buckets. Scaleway is currently working on this restriction, and they already have a solution in private beta, but for now we have to create a new project.
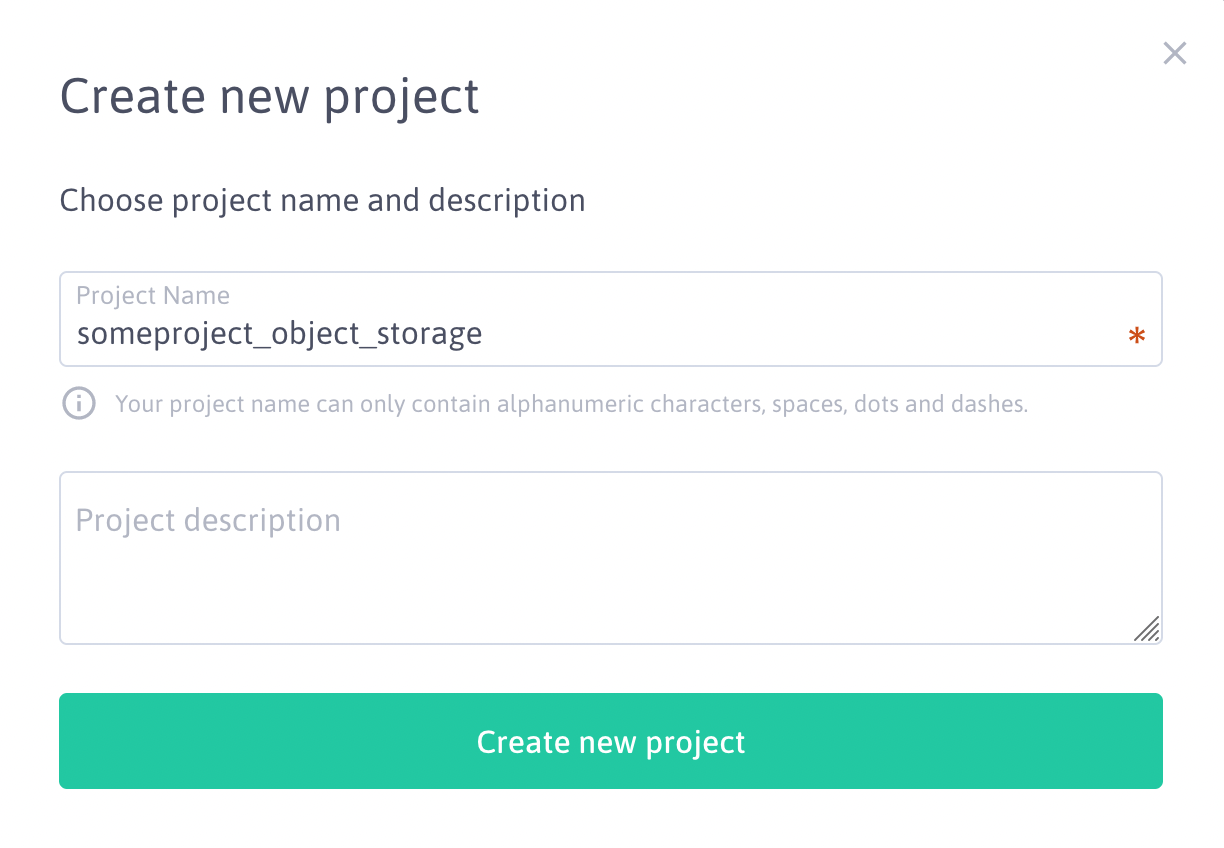
The following screenshots should you how to create a project:
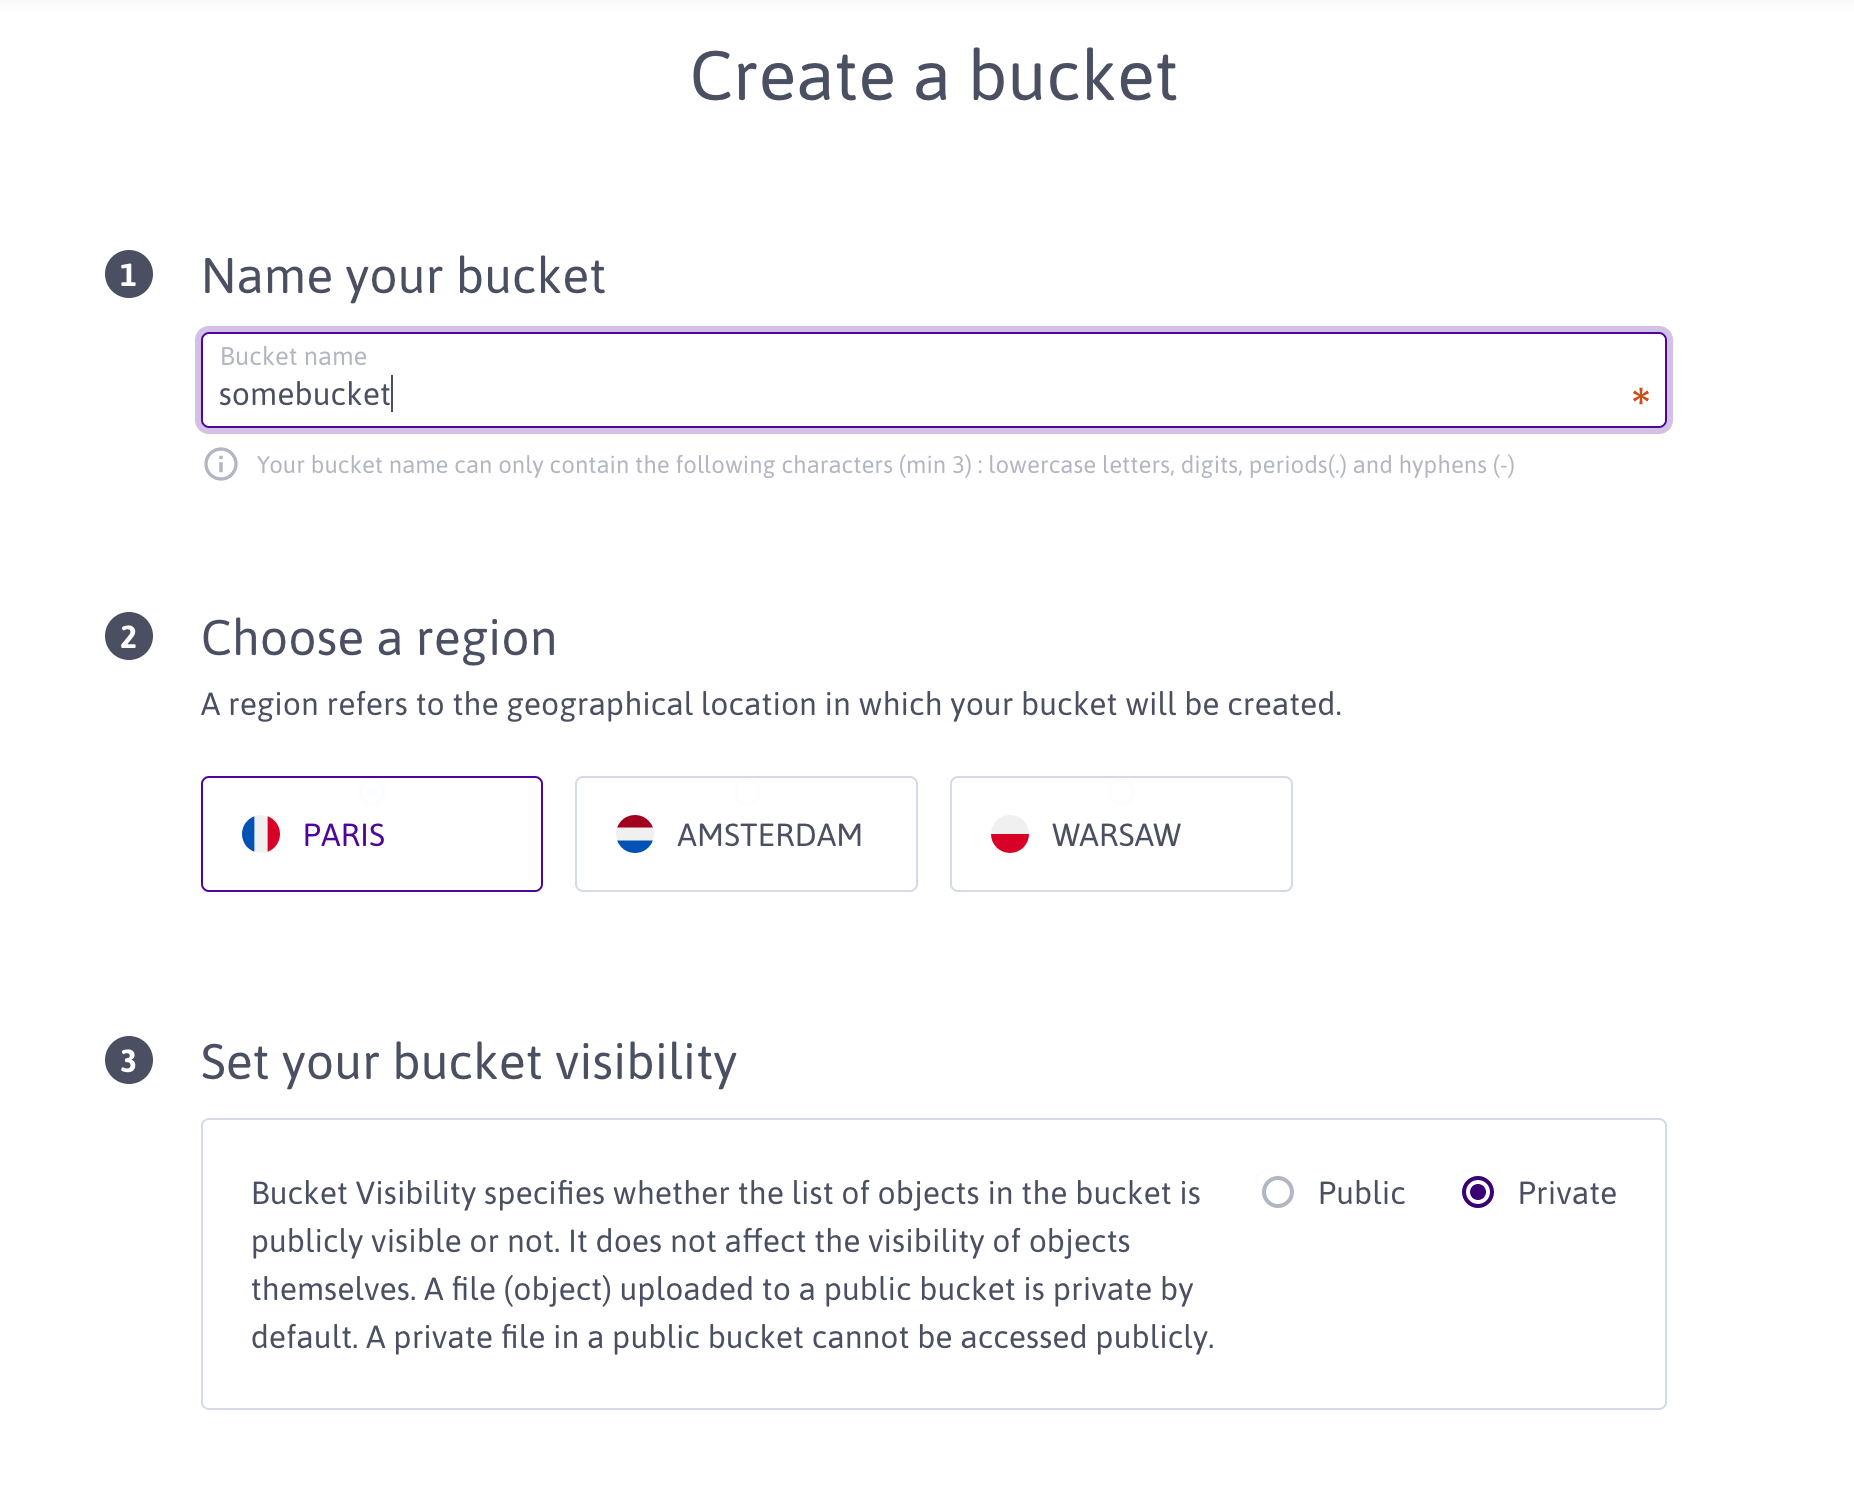
Go to "Object Storage" in the left navigation and click on "Create bucket".
Choose a unique name for the bucket (this cannot be changed) and now select the data center you want your bucket in. If the location does not matter to you that much, I would go with the French data center, because they deploy new feature there first.
You also have to choose the visibility of the bucket. This is a bit confusing, because this has nothing to do with the visibility of the object inside the bucket, only if it is possible to get a list of objects. I would go with "private" even if you are planning on making the objects inside the bucket public.
After creating, you could enable "Bucket Versioning". If this option is enabled, and you delete a file, it will only be marked as deleted, so that it can be restored later.
Create access credentials
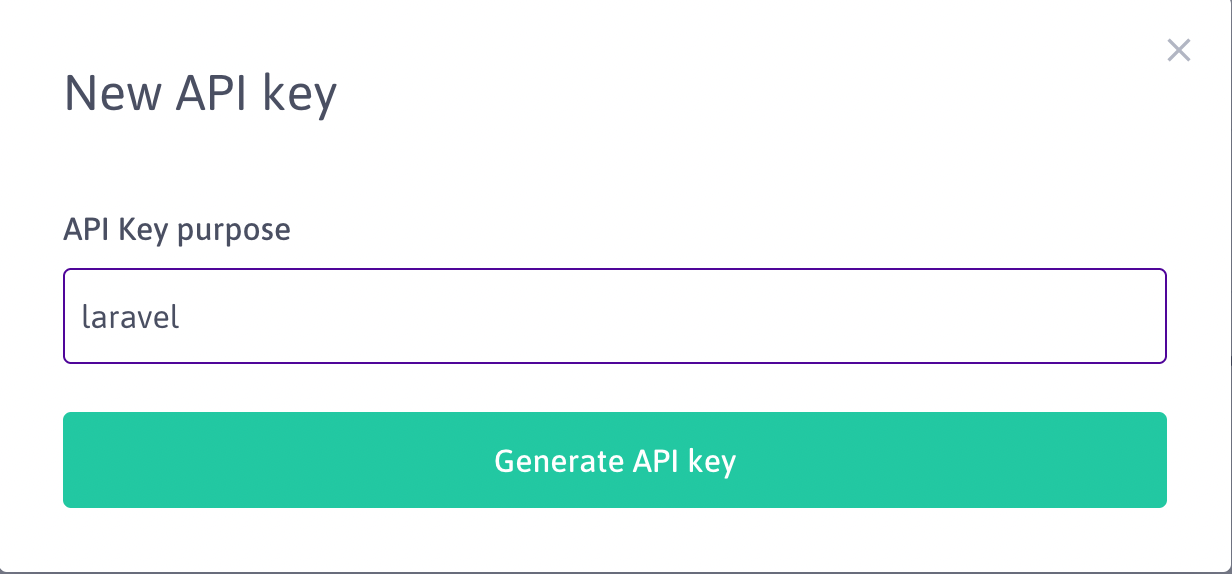
Go to the "Project Dashboard" and then to "Credentials". Now generate a new API key and save the Access key and the Secret Key for later. They will be stored in environment variables in your Laravel setup.
Configure Laravel
For the configuration we'll use a Laravel 9 instance. It should work similar with other Laravel versions.
Before we configure Laravel we have to install the S3 driver.
composer require league/flysystem-aws-s3-v3 "^3.0"
Add the following lines to the disks array in the config/filesystems.php configuration file.
'object_storage' => [
		'driver' => 's3',
		'key' => env('OBJECT_STORAGE_ACCESS_KEY_ID'),
		'secret' => env('OBJECT_STORAGE_SECRET_ACCESS_KEY'),
		'region' => env('OBJECT_STORAGE_DEFAULT_REGION'),
		'bucket' => env('OBJECT_STORAGE_BUCKET'),
		'url' => env('OBJECT_STORAGE_URL'),
		'endpoint' => env('OBJECT_STORAGE_ENDPOINT'),
		'use_path_style_endpoint' => env('OBJECT_STORAGE_USE_PATH_STYLE_ENDPOINT', false),
		'visibility' => 'private',
		'throw' => false,
],
To make this work you have to set the environment variables as well. OBJECT_STORAGE_ACCESS_KEY_ID and OBJECT_STORAGE_SECRET_ACCESS_KEY are the credentials from the previous step.
OBJECT_STORAGE_BUCKET is the name of the bucket that you chose.
OBJECT_STORAGE_DEFAULT_REGION is the Scaleway region of the bucket, which is fr-par, nl-ams or pl-waw, depending on your choice.
OBJECT_STORAGE_ENDPOINT is always https://s3.fr-par.scw.cloud and OBJECT_STORAGE_USE_PATH_STYLE_ENDPOINT is always true.
You only need to set OBJECT_STORAGE_URL if you intend to use a CDN in front of the bucket. In this case, set OBJECT_STORAGE_URL to something like this: https://cdn.someproject.com.
The visibility is set to private which means that if you do not specify the visibility when you add a new file via Laravel the file will be set to private. If your plan is to use this bucket only for public assets like CSS files, public images then set this setting to public.
You can also do this multiple times with different buckets. Just make sure that you use different environment variables for each new bucket. I prefer to create two buckets, one public and one private, to have a clearer separation between publicly accessible files and private files.
'object_storage_private' => [
		'driver' => 's3',
		'key' => env('OBJECT_STORAGE_PRIVATE_ACCESS_KEY_ID'),
		'secret' => env('OBJECT_STORAGE_PRIVATE_SECRET_ACCESS_KEY'),
		'region' => env('OBJECT_STORAGE_PRIVATE_DEFAULT_REGION'),
		'bucket' => env('OBJECT_STORAGE_PRIVATE_BUCKET'),
		'url' => env('OBJECT_STORAGE_PRIVATE_URL'),
		'endpoint' => env('OBJECT_STORAGE_PRIVATE_ENDPOINT'),
		'use_path_style_endpoint' => env('OBJECT_STORAGE_PRIVATE_USE_PATH_STYLE_ENDPOINT', false),
		'visibility' => 'private',
		'throw' => false,
],
'object_storage_public' => [
		'driver' => 's3',
		'key' => env('OBJECT_STORAGE_PUBLIC_ACCESS_KEY_ID'),
		'secret' => env('OBJECT_STORAGE_PUBLIC_SECRET_ACCESS_KEY'),
		'region' => env('OBJECT_STORAGE_PUBLIC_DEFAULT_REGION'),
		'bucket' => env('OBJECT_STORAGE_PUBLIC_BUCKET'),
		'url' => env('OBJECT_STORAGE_PUBLIC_URL'),
		'endpoint' => env('OBJECT_STORAGE_PUBLIC_ENDPOINT'),
		'use_path_style_endpoint' => env('OBJECT_STORAGE_PUBLIC_USE_PATH_STYLE_ENDPOINT', false),
		'visibility' => 'public',
		'throw' => false,
],