How to host a static site on bunny.net CDN with automatic deployment
bunny.net is one of the few european CDN providers and it is the perfect service to host fast and reliable static sites. This guide works for sites generated with static site generators like Jekyll, Ghost, ect. I use bunny.net for my personal website (constantingraf.at) and I will use this site as an example for this guide.
I used to run my website on a nginx server in a docker container. The big advantage of using a bunny.net is that I do not have to maintain and update a server. After deploying the site, everything is maintained by the service. A nice side effect is that it has very fast response times everywhere around the world. This is not that important for my personal site, but it is nice to get this on top and for sites with more traffic this can be very useful.
Setup bunny.net
Start by creating an account for bunny.net.
1. Create a storage zone
First you have to create a storage zone. During the deployment, we will store the website file into this storage zone.
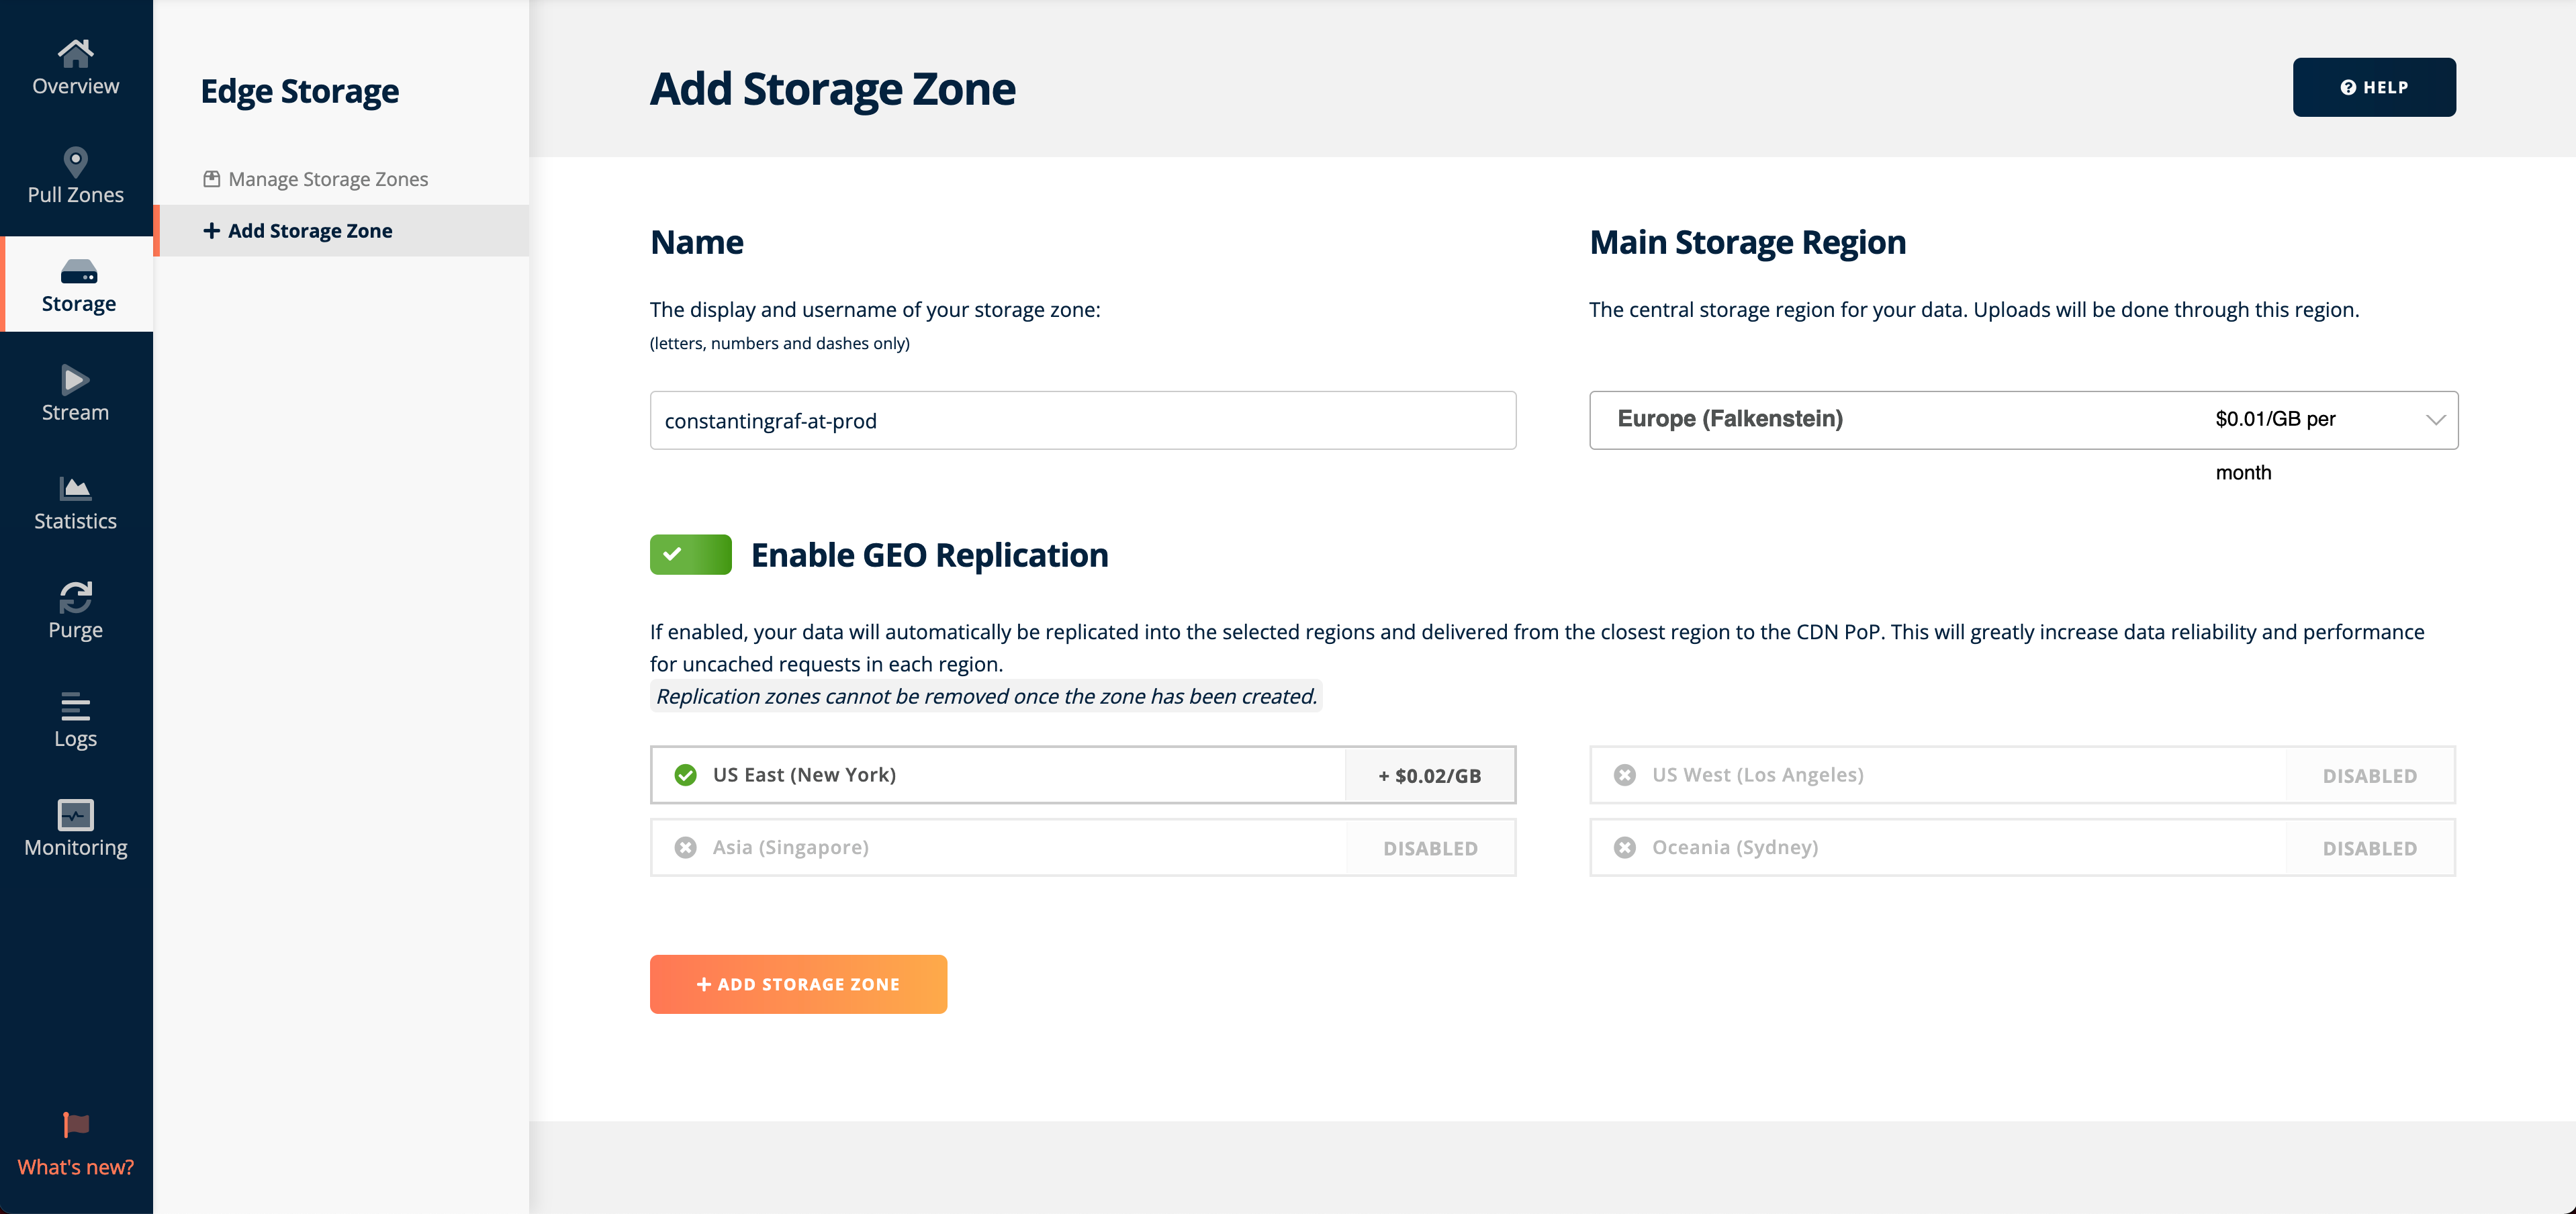
Go to Storage in the navigation and click on "Add Storage Zone". Choose a name, the main region and GEO replication regions. The main region should be the one closest to you and your customers, and the replication regions should cover all other regions from which traffic comes. In my case my main region is in Europe and for safety I add North America.
Warning: Choose the regions wisely, because it is currently not possible to change the main region or remove GEO replication regions after creating the zone. It is possible to add repications afterwards so maybe try less and add later.
2. Create a pull zone
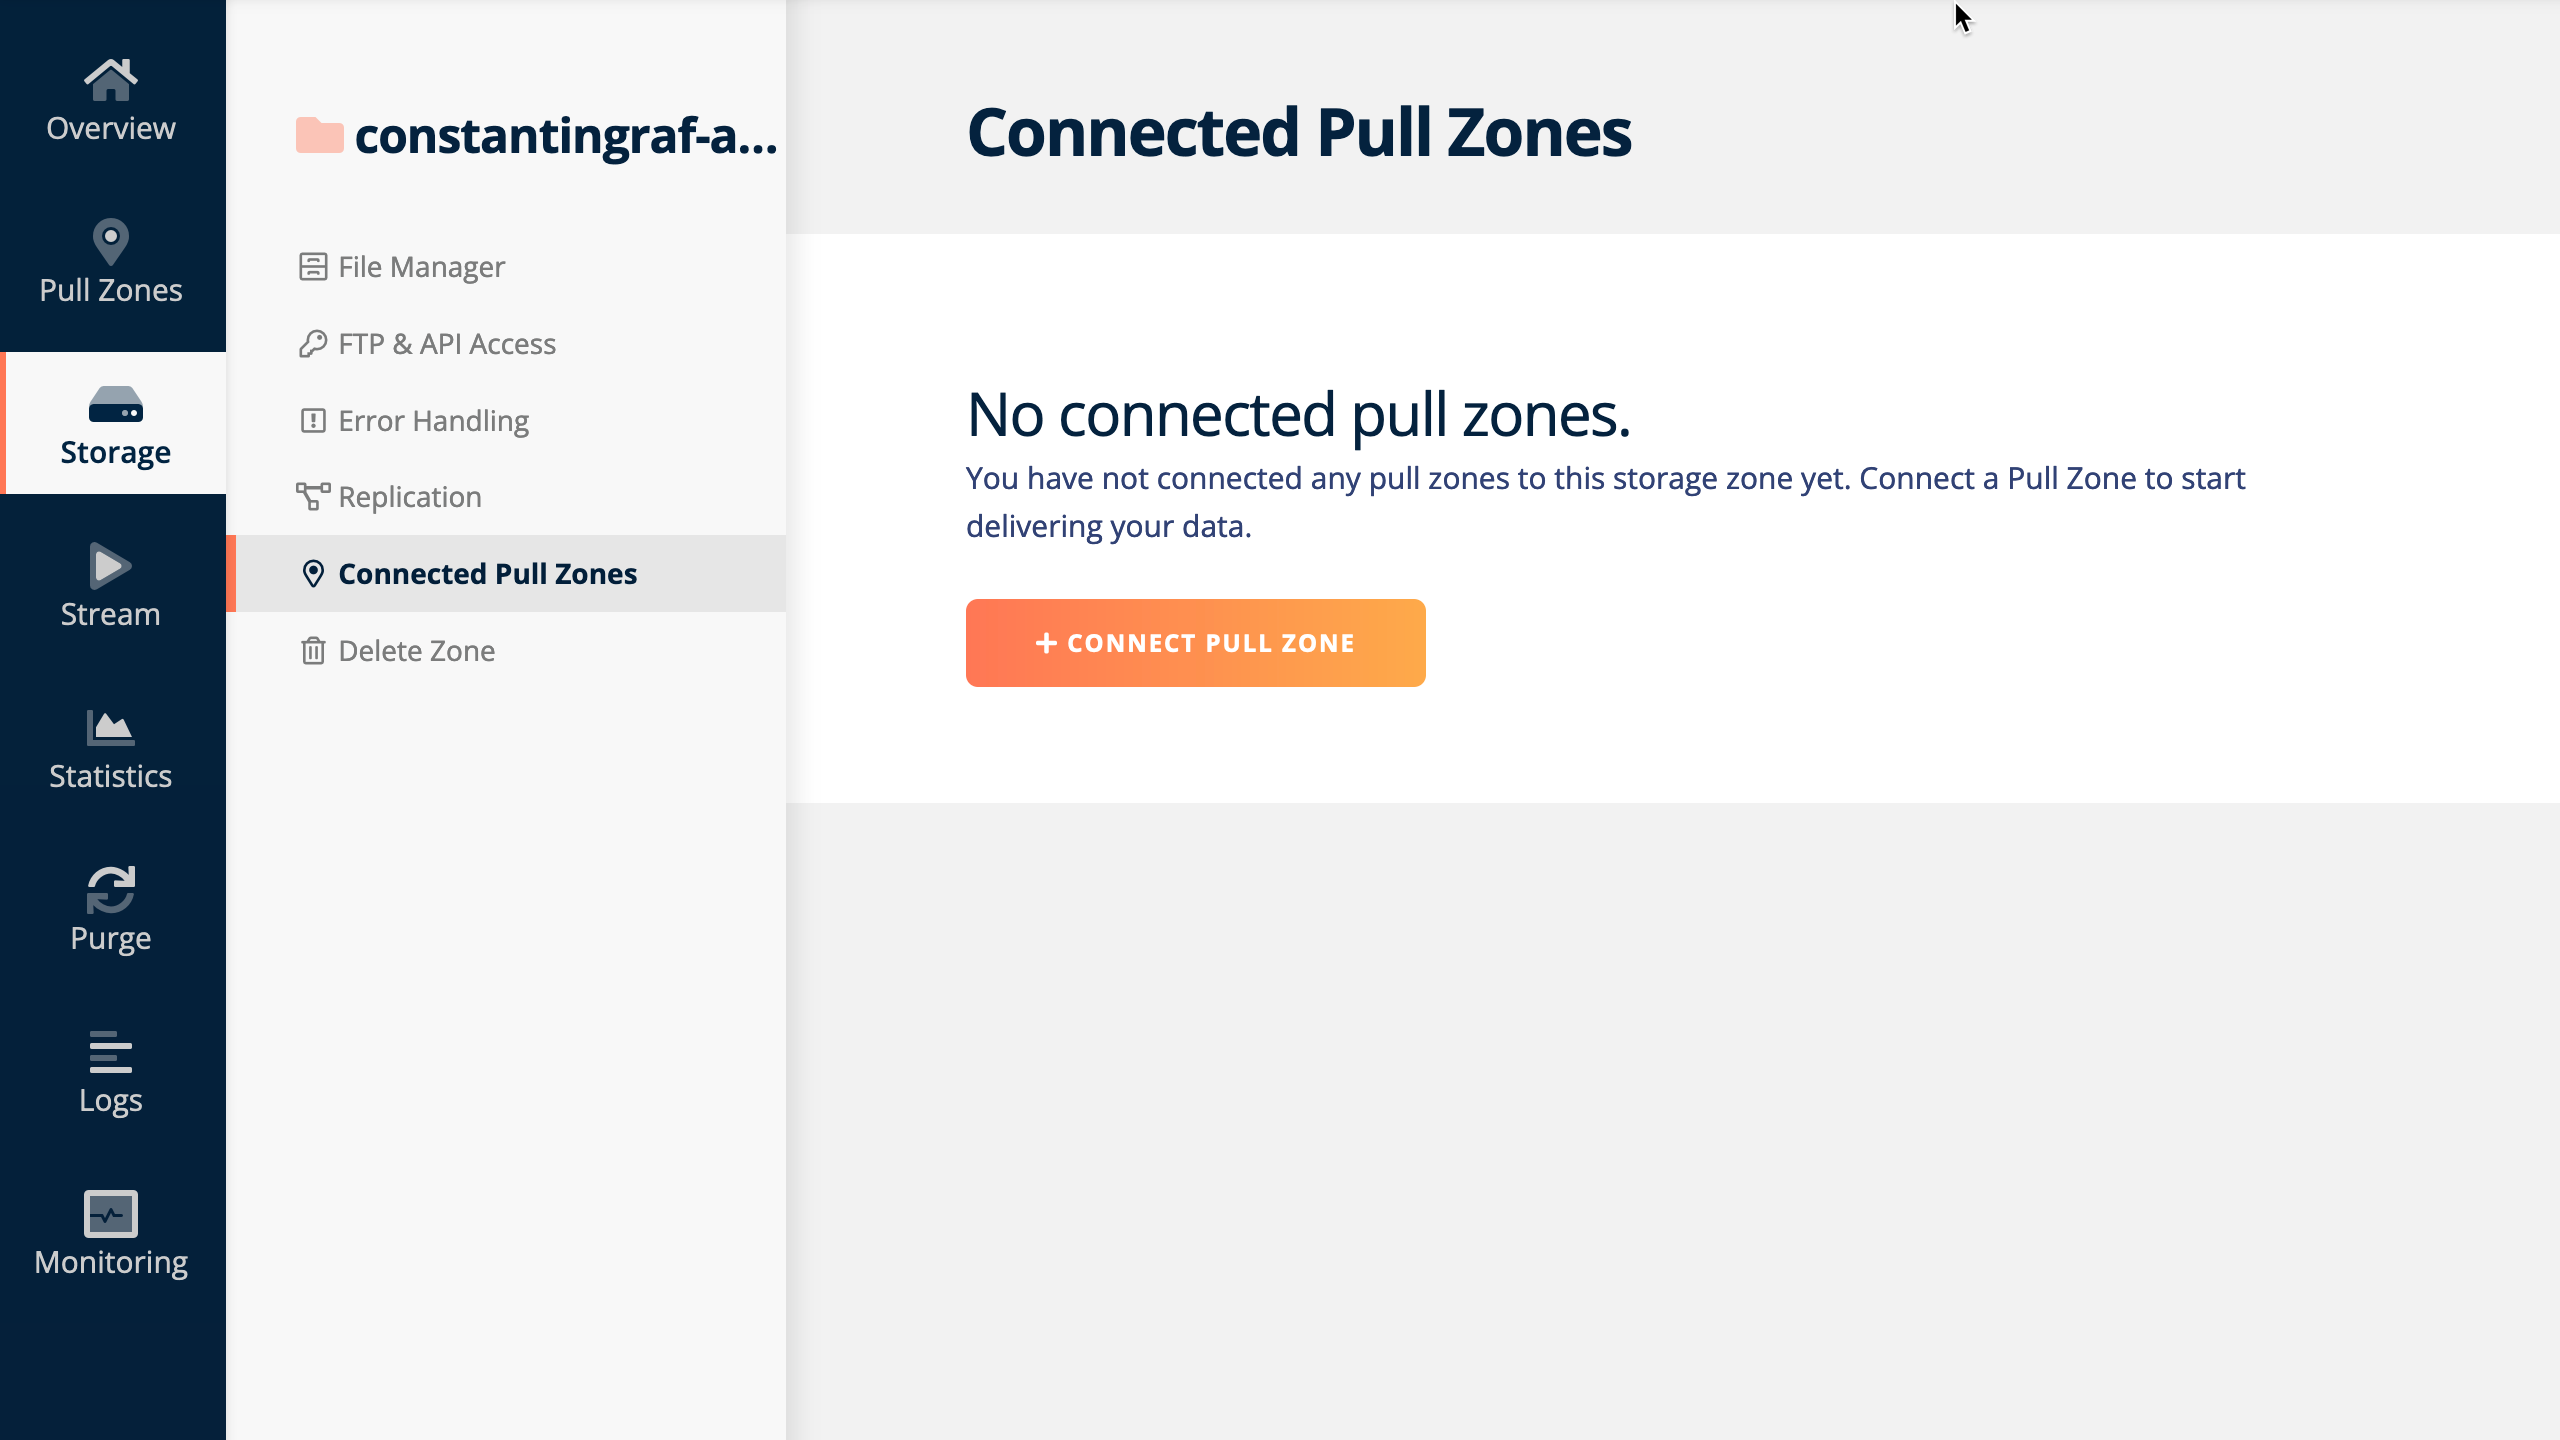
In the newly created storage zone go to "Connected Pull Zones" and click "Connect pull zone".
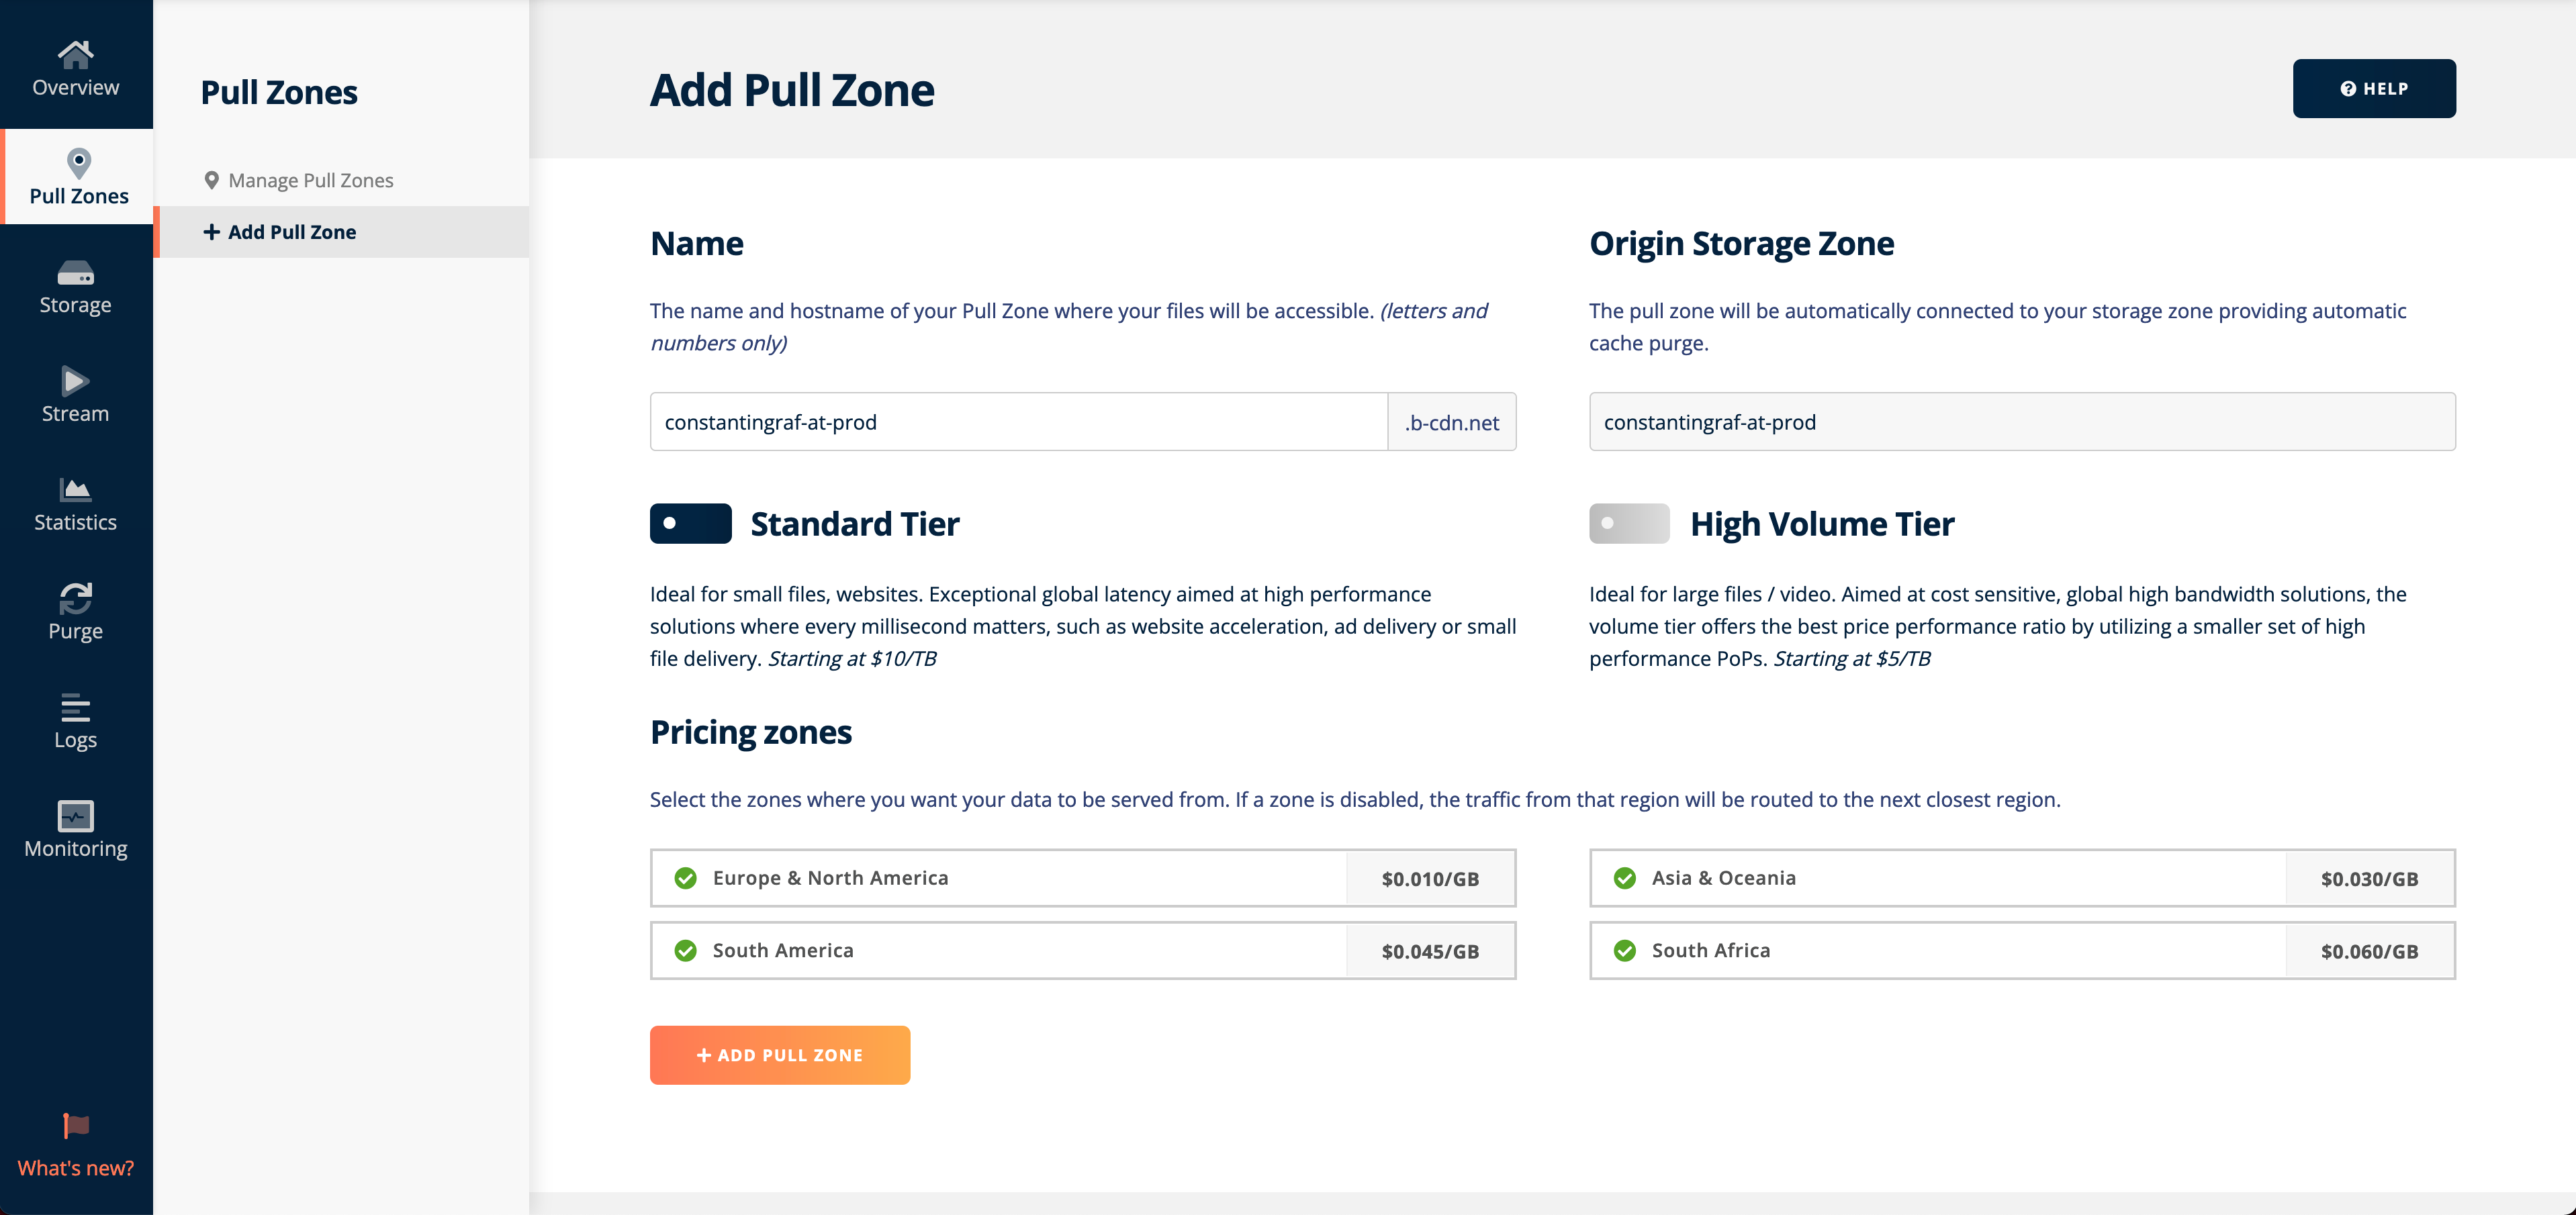
Give the pull zone a name and choose the zones. Click "Create pull zone".
Add the hostname that you want your site to run on. Click “Add” and set the CNAME DNS record.
If you want to run the website on a root domain like me, you have to use an ANAME record (also called ALIAS) instead of a CNAME record. This may reduce your global routing performance, so if you don't need to run the website on the root domain, run it on a subdomain like www instead with a CNAME record. Read more about this topic here.

After the record is set and the SSL certificate is created, activate "Force SSL" to force users to use HTTPS for all requests.
3. Get API keys for storage and account
The edge storage and the pull zone are now ready to use, but the storage is still empty. You could upload your build website file via the uploader into the edge storage and the site would be working. To make this process easier, we will deploy with a CLI tool.
To make this work, we'll need two API keys. One for the edge storage to upload the files and one general API key to purge the cache of the pull zone.
For the edge storage API key, go to the storage edit page and click “FTP & API Access”. Copy the Password.
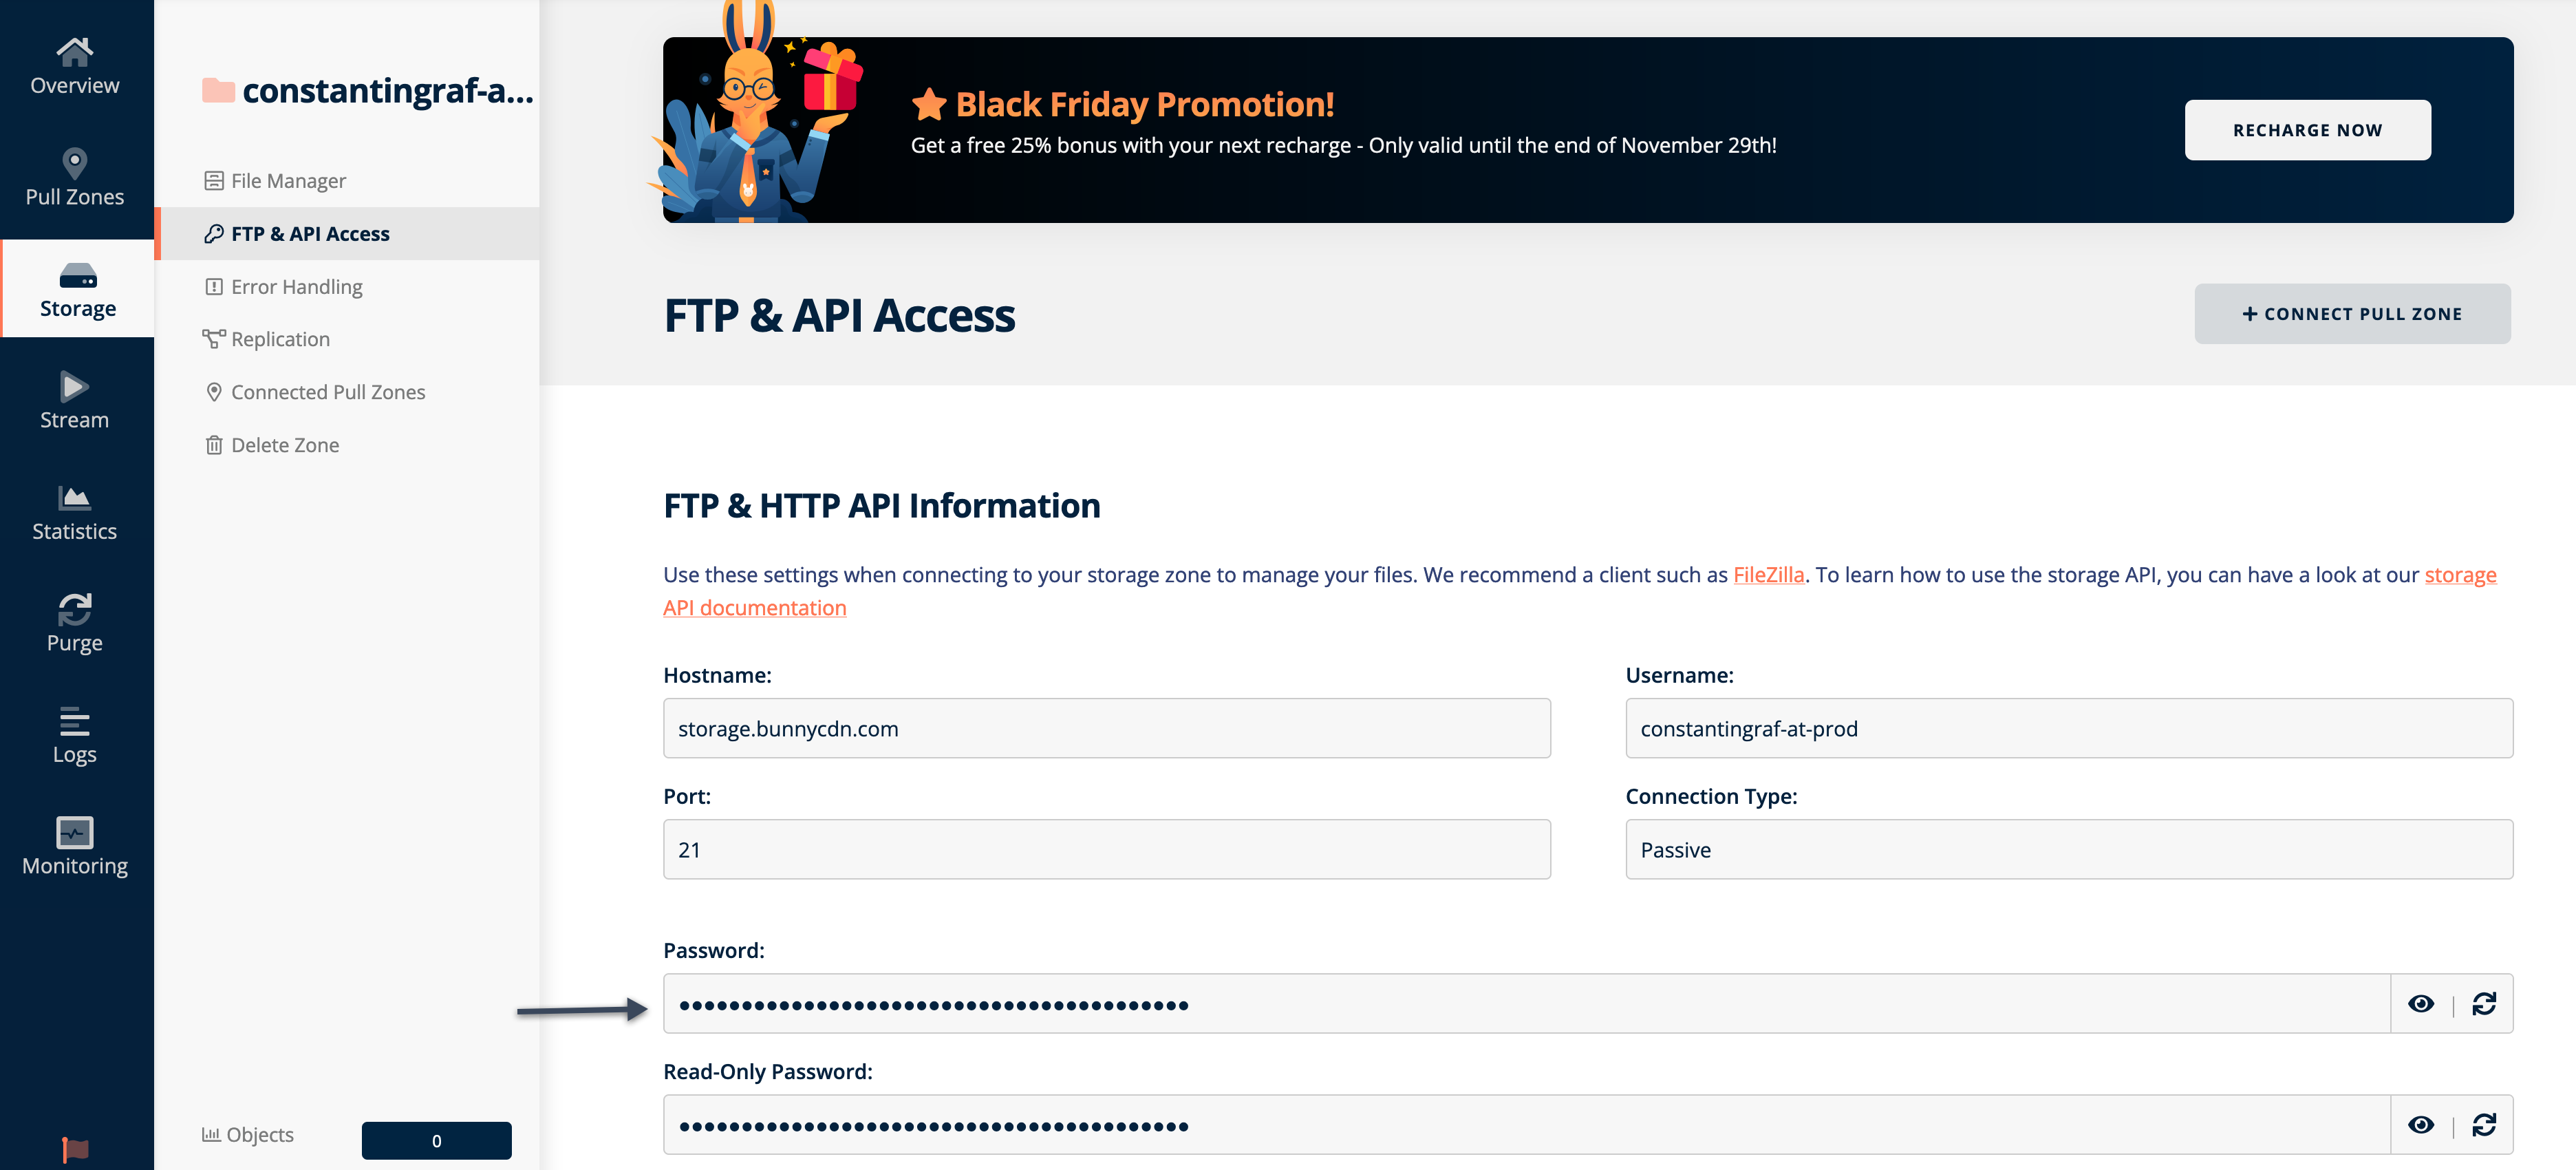
For the general API key, go to the Account Settings and

4. Use CLI tool for deployment
For the automatic deployment, I'll use GitlabCI and the node CLI tool BunnyCDN CLI. The commands have few requirements, so it should be no problem for someone who is familiar with another CI tool to adapt the whole thing with little effort. It is also possible to just the commands locally, for example in a bash script.
deploy-production:
  stage: deploy
  image: node:latest
  before_script:
    - npm install -g bnycdn
  script:
    - bnycdn key set default $BUNNY_API
    - bnycdn key set $BUNNY_STORAGE $BUNNY_API_STORAGE --type=storages
    - bnycdn cp -R -s $BUNNY_STORAGE ./public /$BUNNY_STORAGE/
    - bnycdn pz purge -t $BUNNY_PULL_ZONE
  only:
    - main
  dependencies:
    - build-production
  needs:
    - build-production
Before the first deployment, you have to set the environment variables.
BUNNY_API contains the API key from the general settings, BUNNY_API_STORAGE the API key from the edge storage.
BUNNY_STORAGE and BUNNY_PULL_ZONE contains the name of the edge storage and the pull zone. In this case, it is both constantingraf-at-prod.
After running the pipeline (or the bash script) your website file should be visible in the edge storage and the website should be up and running.
Speed
Running a static website over a CDN is generally already very fast. Storing the files in edge storage in multiple regions around the world makes an already very fast setup even faster and also ensures that cache misses remain fast.
Costs
Bunny.net has a very affordable pricing model. There are no monthly minimums and the traffic is pretty cheap. For the registration, you have to add $10 of credit.
Traffic costs depend on the region, starting from $0.01/GB in Europe and North America up to $0.06/GB in the Middle East and Africa.

The edge storage in Europe and North America costs $0.03/GB.
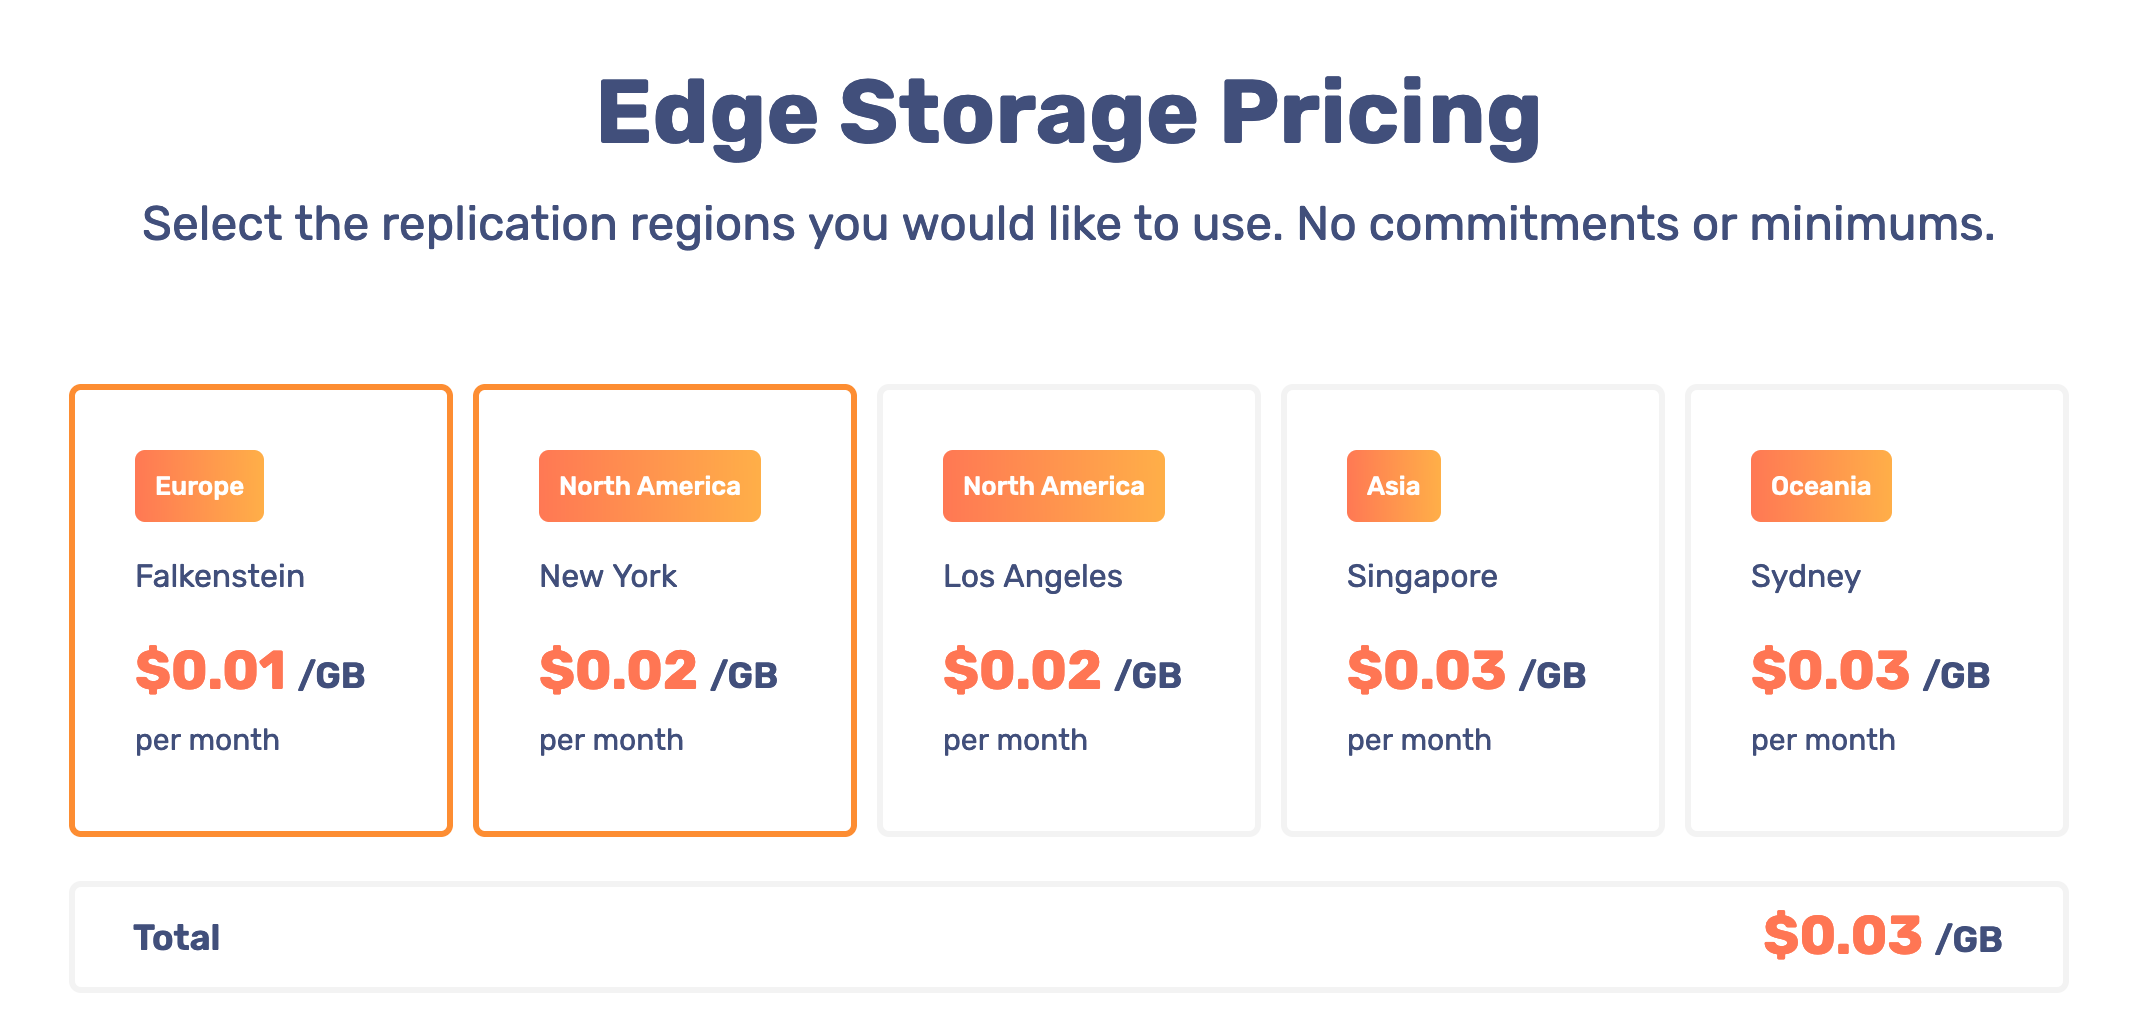
Calculation example: With the $10 that you charged your account, you host sites with 1 GB storage ($0.03) for 3 years with an average of 25 GB of traffic per month.